Setting Up A Microsoft Visual C++ 6 Project to Work With EWin
This is the quick and dirty rundown of the settings in VC6 that need to be
changed before EWin can begin helping to make all of your Windows application
programming faster, smarter, and smilier.
- Download ewin.zip, and extract it somewhere.
Here, I have chosen to extract it under "My Documents".
(Don't worry if your icon for ewin.zip is different -- in this case, WinRAR has overridden the default Windows XP icon for a ZIP file.)

- Load Microsoft Visual C++ 6.0.
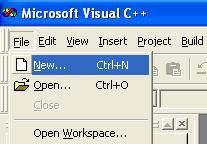
- Click "File".
- Choose "New" from the drop-down menu.
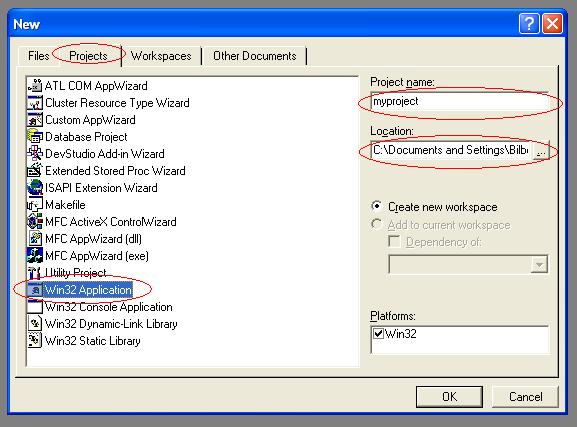
- Click the tab called "Projects".
- Select a "Win32 Application".
- Fill in a name under "Project name:".
- (Optional) Choose a preferred location for the project under "Location:".
- Click "OK".
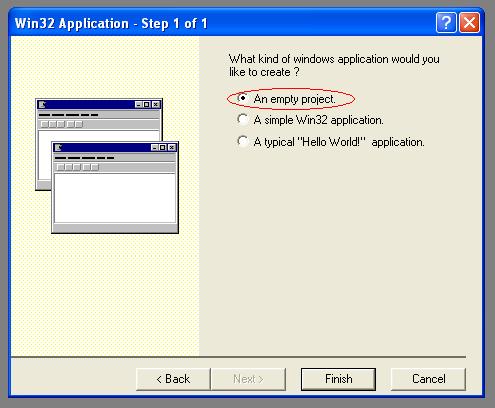
- When you are asked "What kind of windows application would you like to create?":
- Select "An empty project.".
- Click "Finish".
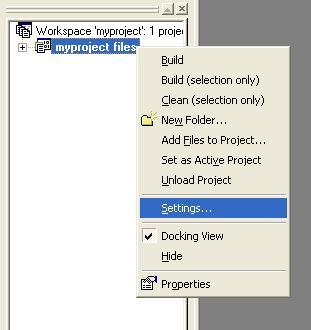
- To the left, you should see a tree view of your workspace.
- Right-click "myproject files", where "myproject" is the name of your project.
- Click "Settings".
- You should now be in the "Project Settings" dialog.
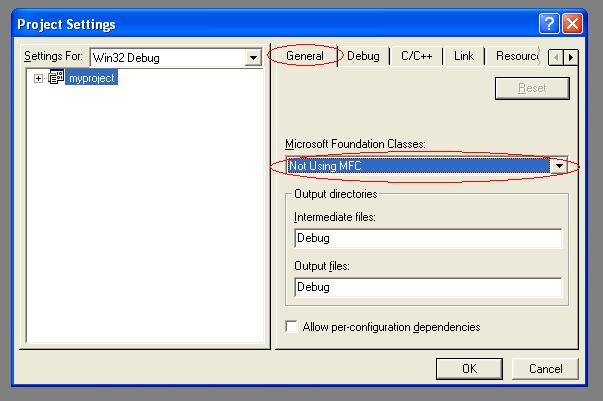
- Choose the "General" tab.
- Make sure that "Not Using MFC" is selected under "Microsoft Foundation Classes:".
- DO NOT CLICK "OK".
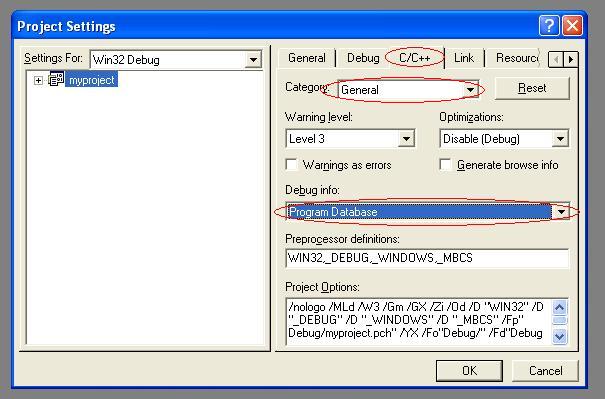
- Switch to the "C/C++" tab.
- Choose category "General".
- Make sure that "Program Database" is selected under "Debug info:".
- DO NOT CLICK "OK".
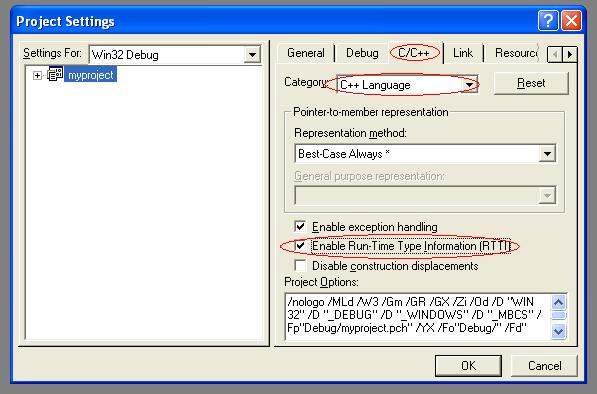
- Remain on the "C/C++" tab.
- Choose category "C++ Language".
- Make sure that "Enable Run-Time Type Information (RTTI)" is checked.
- DO NOT CLICK "OK".
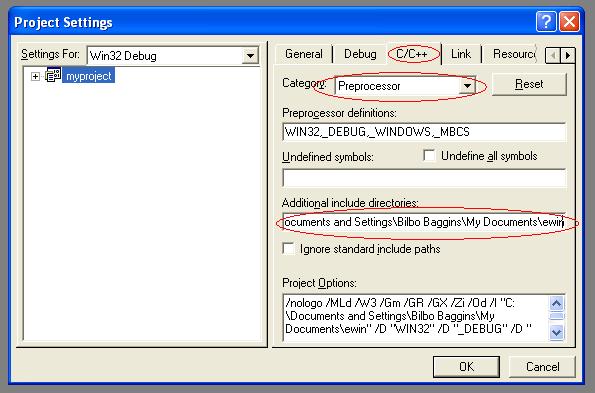
- Remain on the "C/C++" tab.
- Choose category "Preprocessor".
- Under "Additional include directories:" include the complete path to the
location of the extracted EWin files (from step 1).
For example: C:\Documents and Settings\Bilbo Baggins\My Documents\ewin would be the full path
to EWin via my "My Documents" directory. The easiest way to obtain this complete path it
to cut and paste it from Explorer.
- DO NOT CLICK "OK".
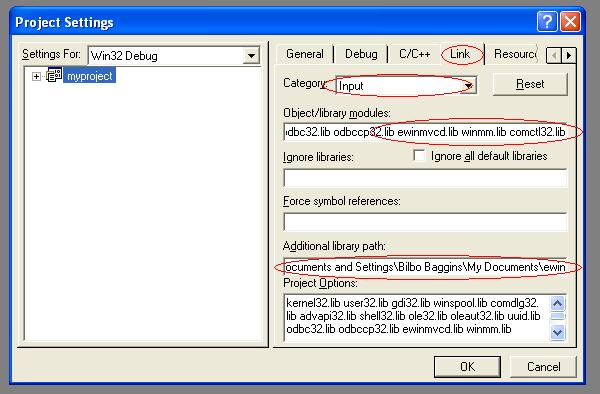
- Switch to the "Link" tab.
- Choose category "Input".
- Add the following entries to the "Object/library modules:" line, putting a space between each one:
ewinmvcd.lib winmm.lib comctl32.lib
- Under "Additional library path:" include the complete path to the
location of the extracted EWin files (you can use the same path you used in the last step).
- Now you can click "OK".
- YOUR CONFIGURATION FOR THIS PROJECT IS COMPLETE.
Creating One of the Boring Sample Programs From the Tutorial
- Now we're going to create a very boring sample program using EWin.
(You can skip all these steps if you're familiar with Visual C++ 6 and just
want to get on with it.)
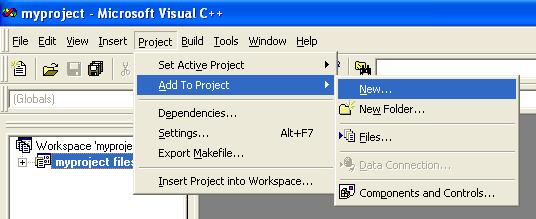
- Click "Project".
- Choose "Add to Project" from the drop-down menu.
- Choose "New..."
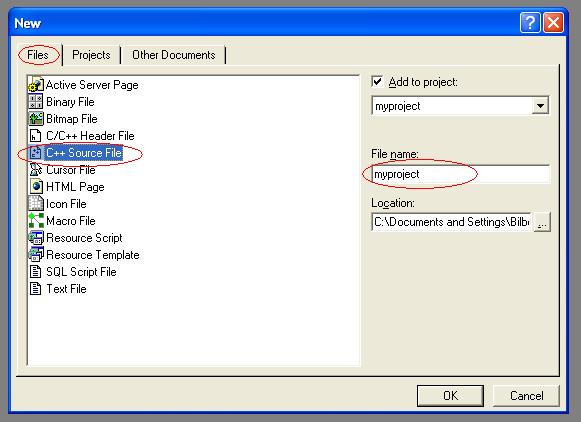
- You should now be in the "New" dialog.
- Choose the "Files" tab.
- Select "C++ Source File".
- Give the file a name under "File name:".
- Click "OK".
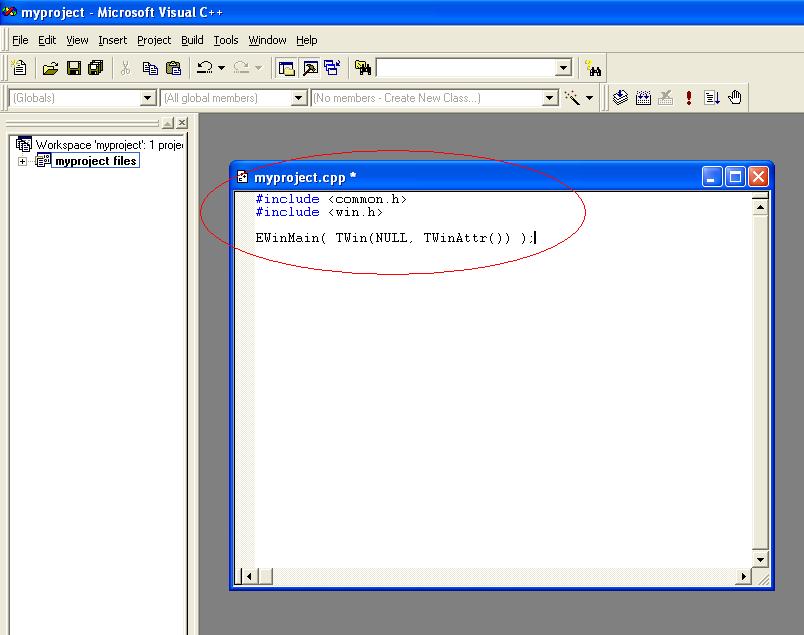
- Your new file should open.
- Enter the following source code into the file:
#include <common.h>
#include <win.h>
EWinMain( TWin(NULL, TWinAttr()) );
- Now we're going to build the program, to see if it compiles.
- Click "Build".
- Choose "Build myproject.exe" where "myproject" is the name of your file.
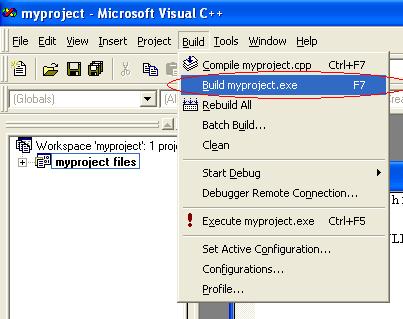
- You should get some messages at the bottom of your screen that look a lot like this:

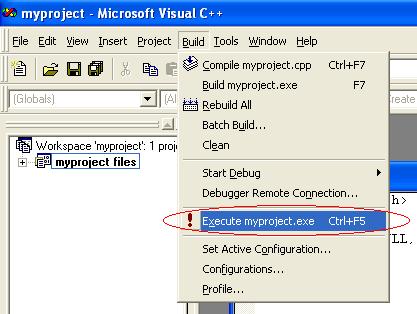
- Now we want to execute the program, to see what it does.
- Click "Build".
- Choose "Execute myproject.exe" where "myproject" is the name of your file.
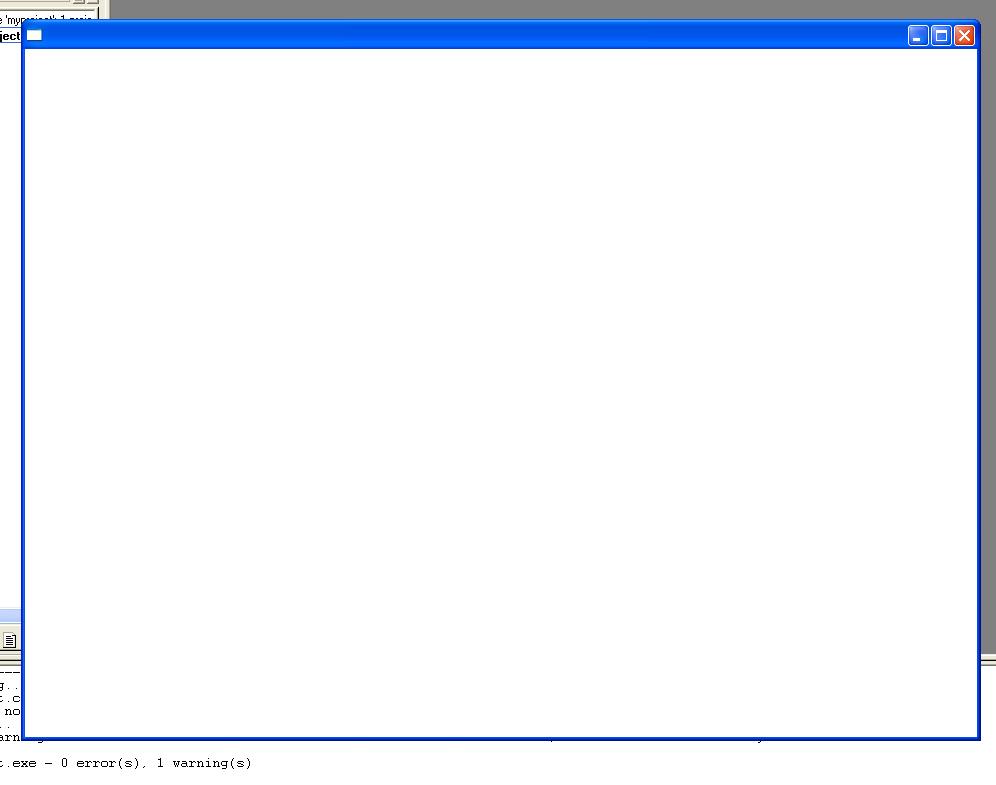
- Voila! This is what the program looks like. It is just a blank window that does nothing. Boring!
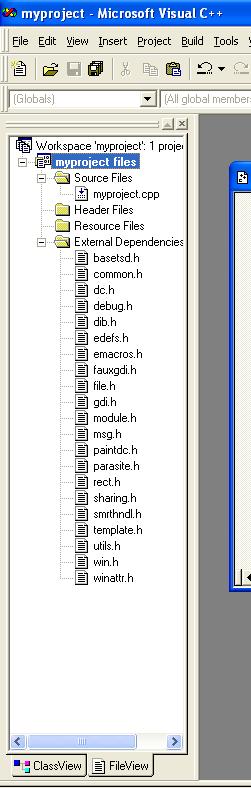
- Just for the sake of completeness, the file tree for your project-that-does-nothing should look a lot like this:
Congratulations! You have set up and compiled your very first project using EWin.
For further questions, consult the tutorial files that were included in ewin.zip, or go back to the main EWin page